Firm settings for Caseware Sherlock
Processing Messages
The Processing Messages report displays information about the numerous data extraction processes that occur each day.
To view the Processing Messages report:
Ensure that you have the Settings Admin role or equivalent privileges.
Open the Cloud menu (
 ) and select Settings.
Select Sherlock | Processing Messages.
The Processing Messages report loads a list of historical data extraction processes the first time it is opened.

(Optional) Use the refresh icon (
 ) to reload the Processing Messages report.
(Optional) Use the search bar or filter (
 ) to narrow the report results to those that match the specified properties.
Property Description Status icons (  ,
, )
)Displays at a glance whether the extraction was a success (  ) or failure (
 ).
).Extraction Time The time when the extraction attempt was performed. Entity The name of the entity where the file is located. File The engagement file name. Last Modified The date when the engagement file was last modified. Status Displays whether the extraction was a success or failure.
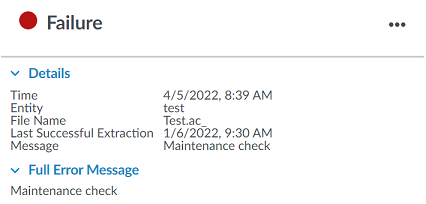
Select a data extraction process from the list to view more details, including the full error message for failed extractions.
Gold Standard Mapping
If your firm has custom Audit templates, you can use Gold Standard Mapping to map the risks, controls and reportable items in your templates to match the Caseware "gold standard". As a result of this mapping process, Sherlock can retrieve the risks, controls and reportable items from engagement files that are based on the firm template.
To configure Gold Standard Mapping:
Ensure that you have the Settings Admin role or equivalent privileges.
Open the Cloud menu (
 ) and select Settings.
Select Sherlock | Gold Standard Mapping.
Select the Add Mapping Rule (
 ) icon below the applicable mapping type to create a new mapping rule, or the Edit (
) icon next to an existing rule.
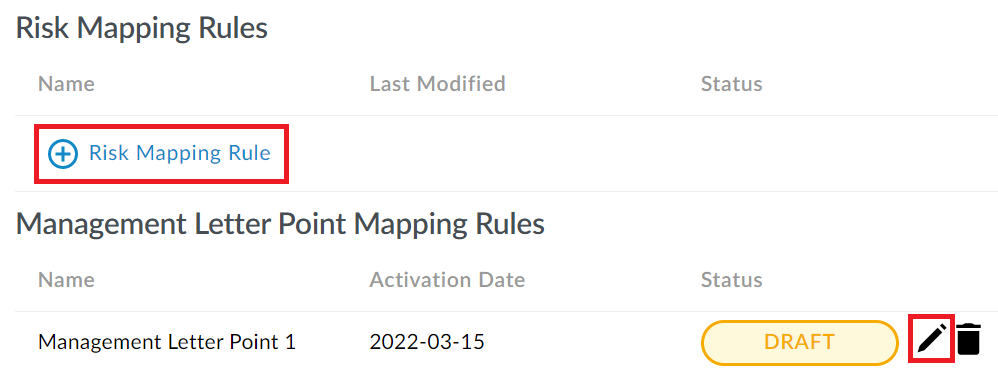
Note: You cannot edit mapping rules with the ACTIVE status.
On the Select Source page, select a Working Papers file from the 20 most recent files. CaseView database information loads from the selected file. Select up to 3 applicable groups and a form.

Select Next.
On the Map IDs to Targets page, you can establish relationships by mapping IDs to targets. Select the Add ID (
 ) icon to the right of a target, then on the Add IDs page, select the applicable IDs to map to the target.
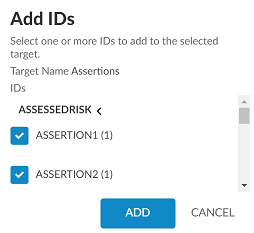
The number next to each ID indicates how many times it has been mapped to a target. Select Add to map the IDs.
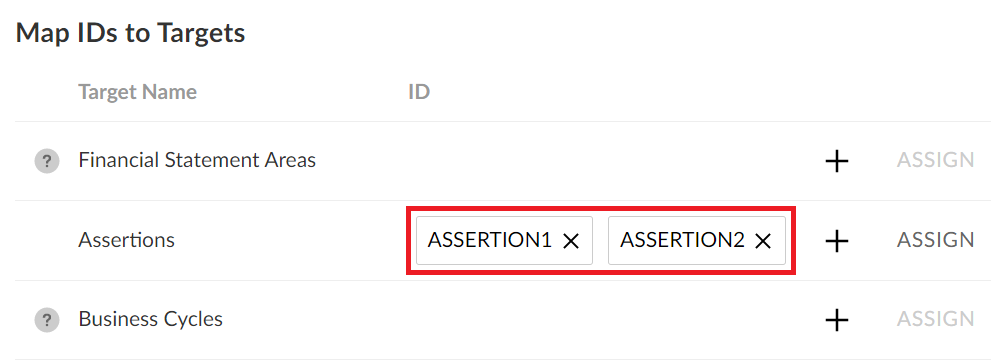
(Optional) Select Assign next to a specific target to assign a value transformation rule. On the Assign Value to Transform page next to the applicable ID, select an existing rule from the drop-down menu, select the Edit (
) icon to edit an existing rule, or select the Add Transformation Rule (
 ) icon to create a new rule. For example:
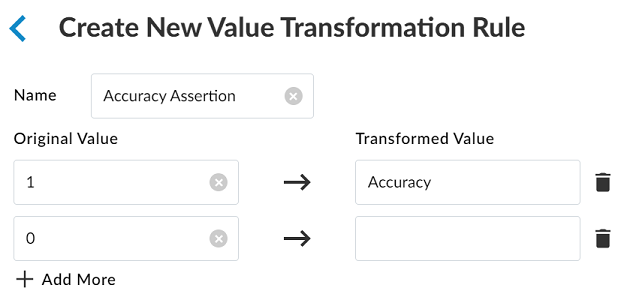
When complete, select Next.
The Summary page displays an overview of the mapping rule. If the mapping rule is complete, select Finish.
The mapping rule is saved as a draft. Select the Edit (
) icon to continue editing the rule, or select ACTIVATE above the mapping type to enable the rule.
Notes:
If there are two rules in the DRAFT status for a particular mapping type, selecting ACTIVATE will enable both rules.
Once active, you can no longer edit or delete a mapping rule.
Each Control, Risk or Management Letter Point can have up to 2 mapping rules.
Related Articles
What is Caseware Sherlock?
Caseware Sherlock is pioneering accounting practice intelligence for firms globally. It’s a powerful, secure, cloud-based business intelligence platform with a sleek user interface. Sherlock automatically gathers and stores data from your firm’s ...Firm Settings Fact Sheet
Firm Settings is a functionality in SMSF Audit that allows firms to customise the template to suit their own internal workflows and processes. Note: It is important to note though that only 1 firm template can be created in SMSF Audit, so we ...Cloud Apps Firm Settings Guide
Firm Settings is the function through which staff with Administrator rights can access CaseWare Cloud apps and customise them, to align with firm workflows and processes. The Firm Settings Guide attached to this FAQ explains what can be customised in ...Xtend Firm Settings Guide
This guide walks through how to customise Xtend to suit your firm using Firm Settings.Get started with Caseware Sherlock Reader
To start, sign in to your firm's Cloud site. As a firm administrator, you must complete the following tasks before your staff can get started: Ensure you've set up your Caseware Cloud firm with staff and entities. Grant your firm's Sherlock Reader ...